Power BI RLS: how to make sure each user sees only their own data
Power BI RLS in practice: static and dynamic row-level security, USERPRINCIPALNAME, permissions tables, testing, embedded reports and common mistakes.
In short
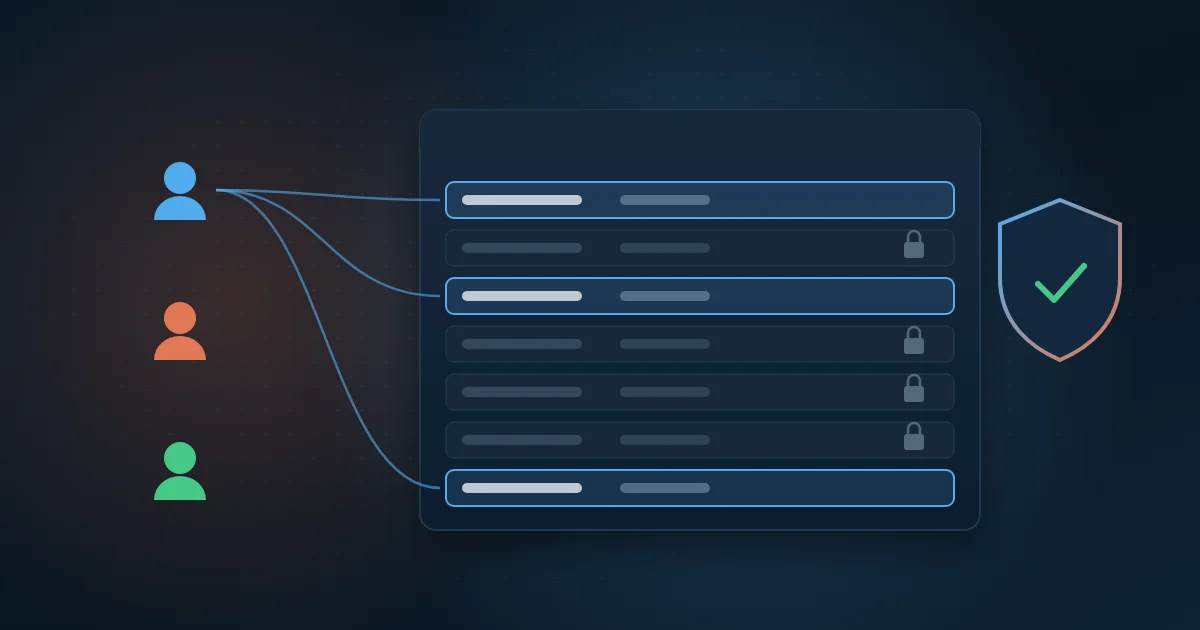
- Power BI RLS filters the data in a single report according to the signed-in user, so you avoid copying the report for each manager, branch or customer.
- Prefer dynamic RLS: a single role, a permissions table with email addresses and the USERPRINCIPALNAME function, instead of dozens of static roles.
- RLS only restricts users with Viewer permission; workspace Admins, Members and Contributors see all the data, so review who holds those roles.
- Manage the permissions table in an app with single sign-on and history, not in a loose spreadsheet, and test each profile with View as.
Every company that distributes Power BI reports ends up with the same question: how do you show the same dashboard to leadership, to each regional manager and to each sales rep without anyone seeing someone else's numbers? Copying the report for each audience looks fast, but it multiplies maintenance and the risk of someone getting the wrong file.
The answer is RLS (row-level security). With it, a single model and a single report filter the data according to the user who is signed in. For most companies, the best path is dynamic RLS, with a permissions table and the USERPRINCIPALNAME function.
In this guide you will see how Power BI RLS works, the difference between static and dynamic, how to set it up and test it, what changes in embedded reports, the most common mistakes, and why an app to manage who sees what is worth having.
What is RLS in Power BI and how does it work?
RLS is a security layer applied to the semantic model, the part of Power BI that holds tables, relationships and measures. You create roles and, for each one, write a rule in DAX, Power BI's formula language, that defines which rows of a table that role can see. The filter flows through relationships: if the role only sees the Campinas branch in the branches table, sales, targets and inventory are also restricted to Campinas.
Roles are created in Power BI Desktop, and users or groups are assigned to them in the Power BI service. One important detail: RLS only restricts users with Viewer permission. Workspace Admins, Members and Contributors see all the data, because they can edit the content.
Static or dynamic RLS: which one should you choose?
Static RLS
In static RLS, each role has a fixed value in its rule, such as Region equals South. It works well when there are few slices and they rarely change. The problem shows up as you grow: 30 branches become 30 roles, and every change requires editing and republishing the model. In operations with many customers, branches or sales reps, static RLS turns into manual maintenance.
Dynamic RLS with USERPRINCIPALNAME
In dynamic RLS, there is a single role and a permissions table that links each user's email to what they can see. The rule uses USERPRINCIPALNAME, a DAX function that returns the user's sign-in name in Microsoft Entra ID, usually their work email. Power BI compares that sign-in with the table and keeps only the allowed rows. When someone changes departments, you change one row in the table, not the model.
A simple permissions table usually has:
- The user's email, exactly as it appears at sign-in.
- The code of the allowed slice: branch, region, cost center, customer portfolio or country.
- One row per user and slice combination, for people who access more than one branch.
- A full-access flag for leadership, or a separate role with no filter.
How do you set up and test dynamic RLS?
The steps below work for most models in import mode:
- Create the permissions table in a controlled source, such as a database, with the email and the slice code.
- Load the table into the model and hide it. Avoid connecting it to the rest of the model with a bidirectional relationship.
- In Modeling, Manage roles, create a role with a filter on the dimension (for example, Branch) that keeps only the codes linked to USERPRINCIPALNAME() in the permissions table.
- Handle the exceptions: full access for leadership and what happens to people who are not in the table. The safe default is to see nothing.
- Test in Desktop with View as, simulating real users.
- Publish and, under the semantic model's Security option in the service, add Microsoft Entra ID users or groups to the role.
- Give consumers Viewer permission or distribute the content through a Power BI app, so that RLS is applied.
- Schedule the model refresh: in import mode, changes to the permissions table only take effect after the refresh.
How to test with View as
In Power BI Desktop, the View as option, on the Modeling tab, lets you choose the role and enter another user, simulating the result of USERPRINCIPALNAME. In the service, the same test is under the semantic model's Security settings, in Test as role. Build a script with real cases: a user with one branch, one with several, a director and an email that is not in the table. Check that the totals match what you expect. Measures that use ALL still respect RLS, so a percentage of total shows the total of what the user can see, not the company's.
How does RLS work in embedded reports?
When the report is embedded in a portal or system with Power BI Embedded, there are two scenarios. If the users belong to your organization and sign in with their Microsoft Entra ID account, RLS works just as in the service. If the report is shown to customers or partners who have no account in your organization, the application authenticates with Power BI and generates an embed token with an effective identity: the user name and the roles that apply to that user.
In this case, USERPRINCIPALNAME returns the name sent by the application, which can be an email or a customer code. The golden rule is that this identity must be set on the server, based on your system's sign-in, and never in the browser. If you are deciding between embedding Power BI and building your own dashboard, see when to use an HTML/CSS dashboard or Power BI.
RLS and object-level security: what is the difference?
RLS restricts rows; object-level security (OLS) hides entire tables or columns from certain roles. It is useful when the issue is not which branch a person sees, but which information: cost, margin or salary, for example. For users without access, the column simply does not exist in the model, and visuals that depend on it show an error. OLS is usually configured with external tools such as Tabular Editor, and it can be combined with RLS in the same model.
What are the most common RLS mistakes?
- Bidirectional relationships scattered across the model. Security filters flow along unexpected paths, can hide or expose data incorrectly, and make the report slower.
- One role per customer, branch or person. Dozens of roles become manual maintenance and increase the chance of someone landing in the wrong role.
- Permissions kept in a loose spreadsheet. With no owner, no history and no validation, a mistyped email removes someone's access or grants access to someone who should not have it.
- Using page filters or slicers to hide data. That is not security: the user can change the filter.
- Assuming RLS applies to everyone. Workspace Members, Contributors and Admins see everything.
- Testing only with your own user. The case that leaks is usually the one nobody simulated.
Why use an app to manage access?
With dynamic RLS, security depends on the quality of the permissions table. That is why, instead of a spreadsheet, it pays to have a small registration app, a CRUD (create, read, update and delete records), where the business team grants and revokes access without opening a ticket with IT.
A good access app has single sign-on with Microsoft Entra ID, a list of slices taken from the model itself (branches, countries, portfolios), approval when needed and a history of who granted what and when, and it writes the data to a database that Power BI reads. That was the approach at MasterSense: sales from 4 countries, in 3 languages, sit in a single BI on Microsoft Fabric with SAP HANA data, and an access app defines who sees what. This kind of application is part of our custom software, and there is an interactive registration app with access control in our examples gallery.
How Wolkee helps
Wolkee designs Power BI models with RLS from the start: permissions table, DAX rules, testing by profile and, when it makes sense, an access management app integrated with Microsoft Entra ID. We have 9 years in the market, more than 500 deliveries and projects in 8 countries, with dashboards and BI for finance, sales, operations and contact centers.
If you need to review the security of your reports or start a new model, book a free 30-minute assessment. We show you a working prototype before the contract and reply within 1 business day.
Frequently asked questions
Does Power BI RLS require a Premium license?
No. RLS does not depend on a specific license: it is defined in Power BI Desktop and applied in the service. What changes is access to the content. In regular shared workspaces, viewers need a Pro or Premium Per User license; on Premium or Fabric capacities of the right size, users with a free license can also view. Check the current rules with Microsoft.
Does RLS work with DirectQuery?
Yes. RLS works in both import mode and DirectQuery. In DirectQuery, security filters are translated into the queries sent to the source, so performance also depends on the database. If the report uses a live connection to an Analysis Services model, the roles are defined in that model, not in the Power BI file.
Can users under RLS export data they should not see?
No. Export respects RLS: users export only the rows they can see in the model. The point to watch is different: if they have edit permission in the workspace, RLS does not apply and they see and export everything. It is also worth reviewing, in the tenant and report settings, who can export and in which formats.
What is the difference between USERNAME and USERPRINCIPALNAME?
Both functions identify the signed-in user, but they can return different formats. In Power BI Desktop, USERNAME usually returns domain and user, while USERPRINCIPALNAME returns the sign-in in email format. In the service, both return the user principal name. For consistency across environments, the general recommendation is to use USERPRINCIPALNAME in the rule and in the permissions table.